
How to Change Necks on a Shark Guitar
SHARK OWNER'S GUIDE
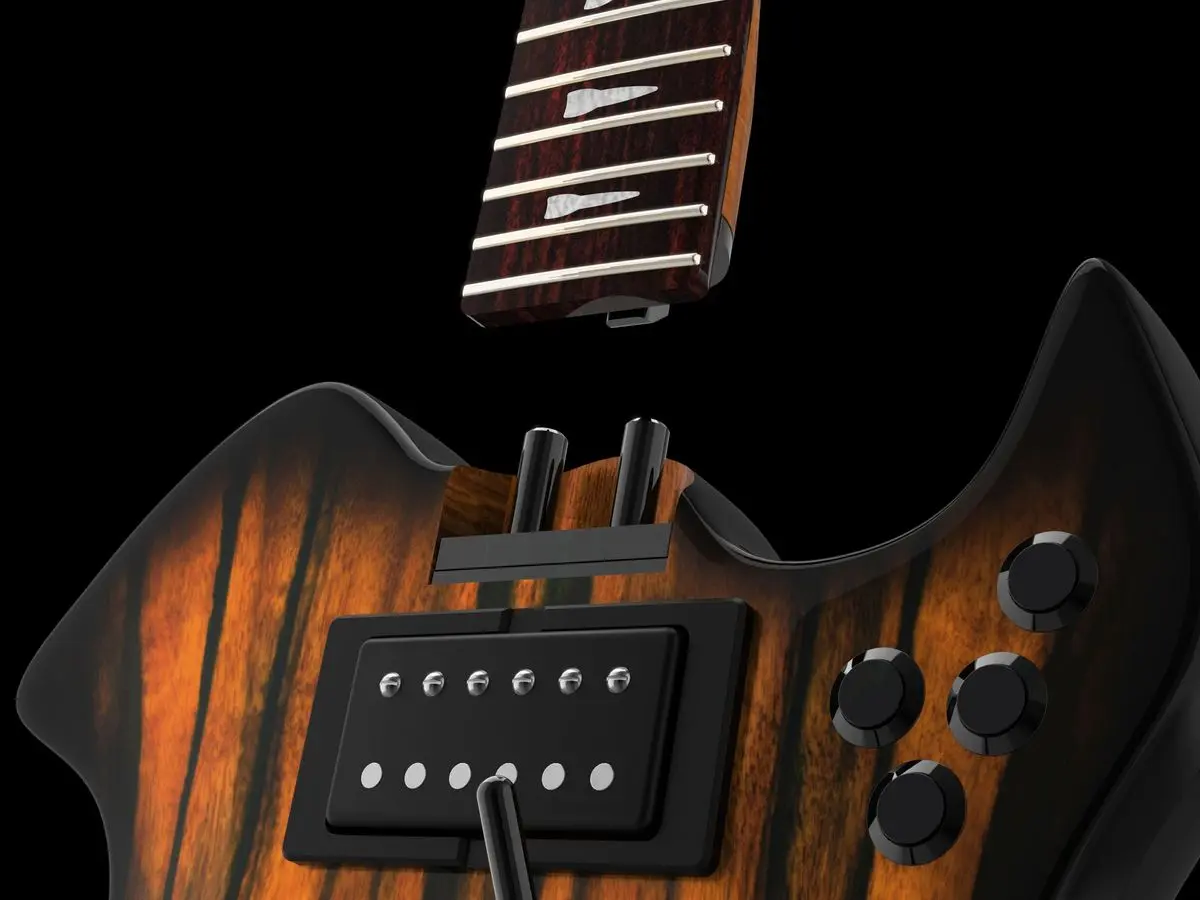
Changing necks on a Shark Guitar is one of the most distinctive features of the Ocean Environment system. The process takes 30 seconds or less and requires no tools or restringing. This quick-change capability exists because of three patented components working together: the T-Form Titanium Spine with its micron-tolerance body joint, the removable Shark Nut with its integrated string carrier, and the Shark Tremolo's maintenance mode.
This guide walks through the complete process step by step.
What You Need
Before starting, gather these items:
-
Your Shark Guitar
-
A flat, soft surface (padded workbench, guitar mat, or soft towel)
-
The replacement neck you want to install
Understanding the System
Three main components enable the quick neck change:
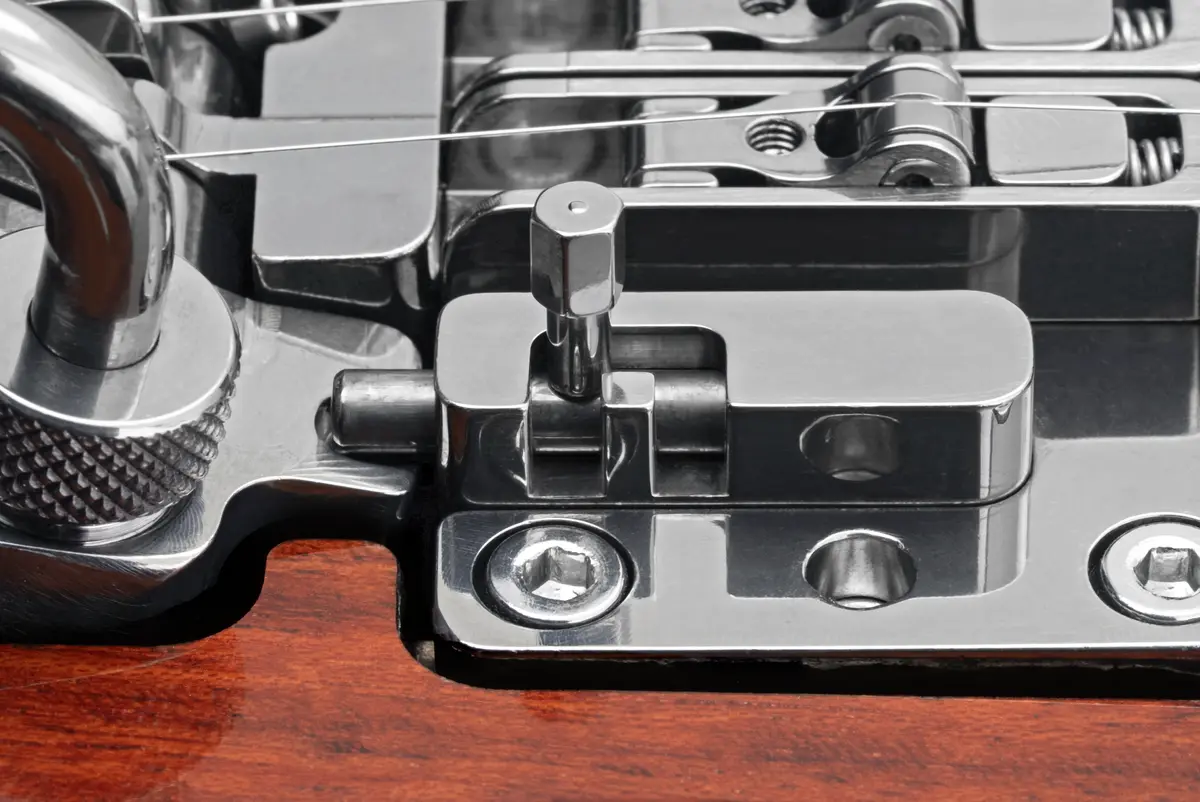
- Maintenance Mode: A setting on the Shark Tremolo that removes tension from the strings, making the nut carrier easy to remove without loosening tuners individually.
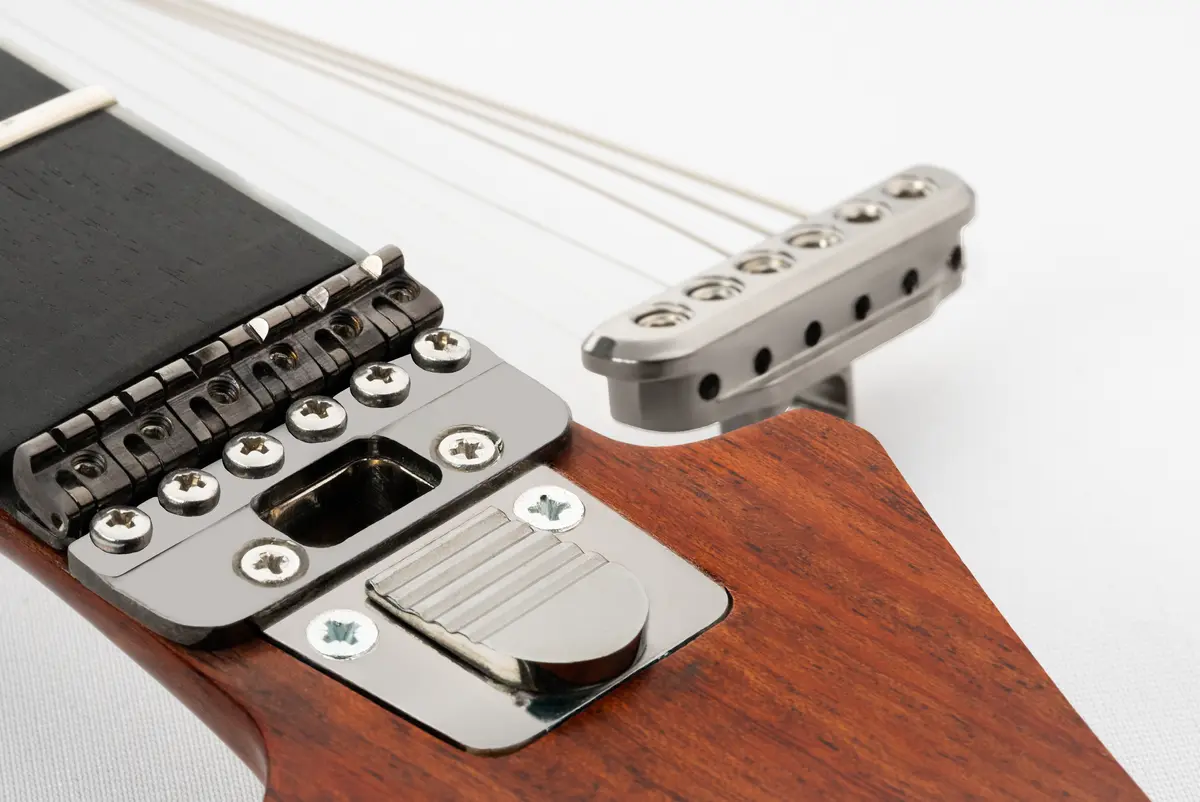
- The Shark Nut's String Carrier: The upper piece of the titanium nut holds all six strings. It can be removed as a single unit with the strings still attached, using a simple slide-latch mechanism.
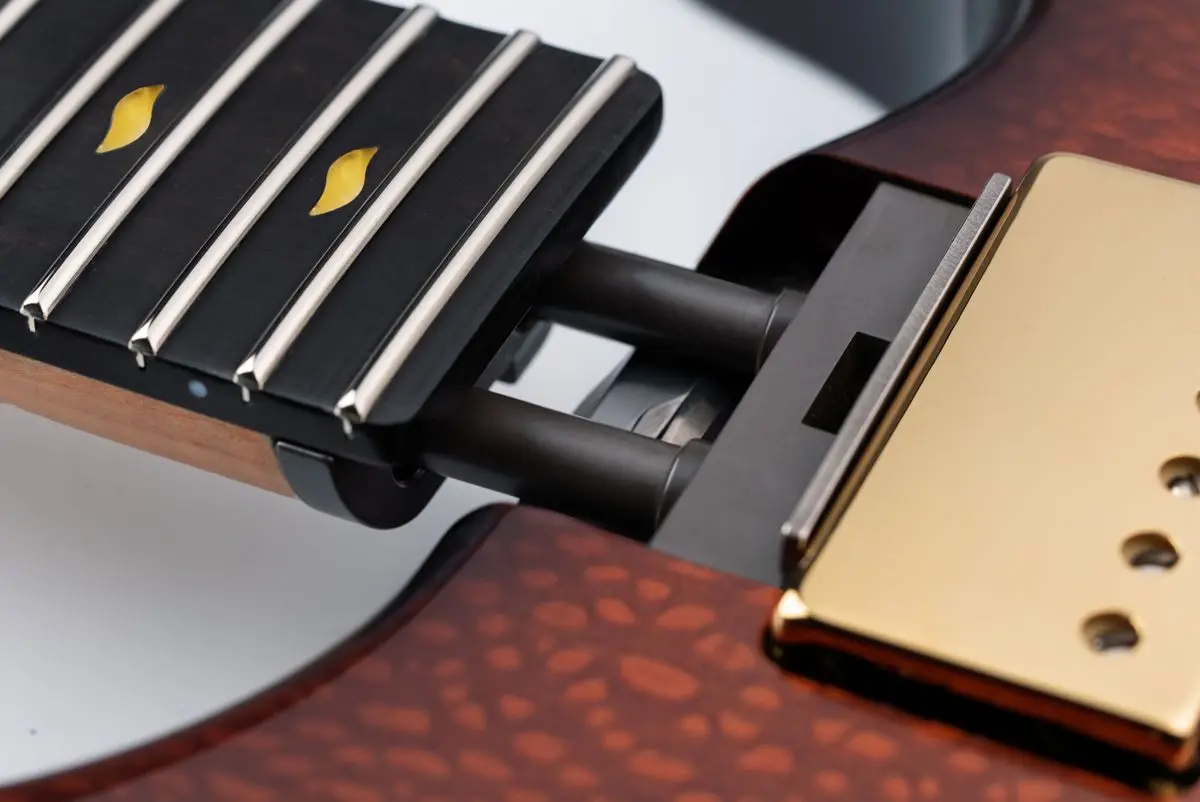
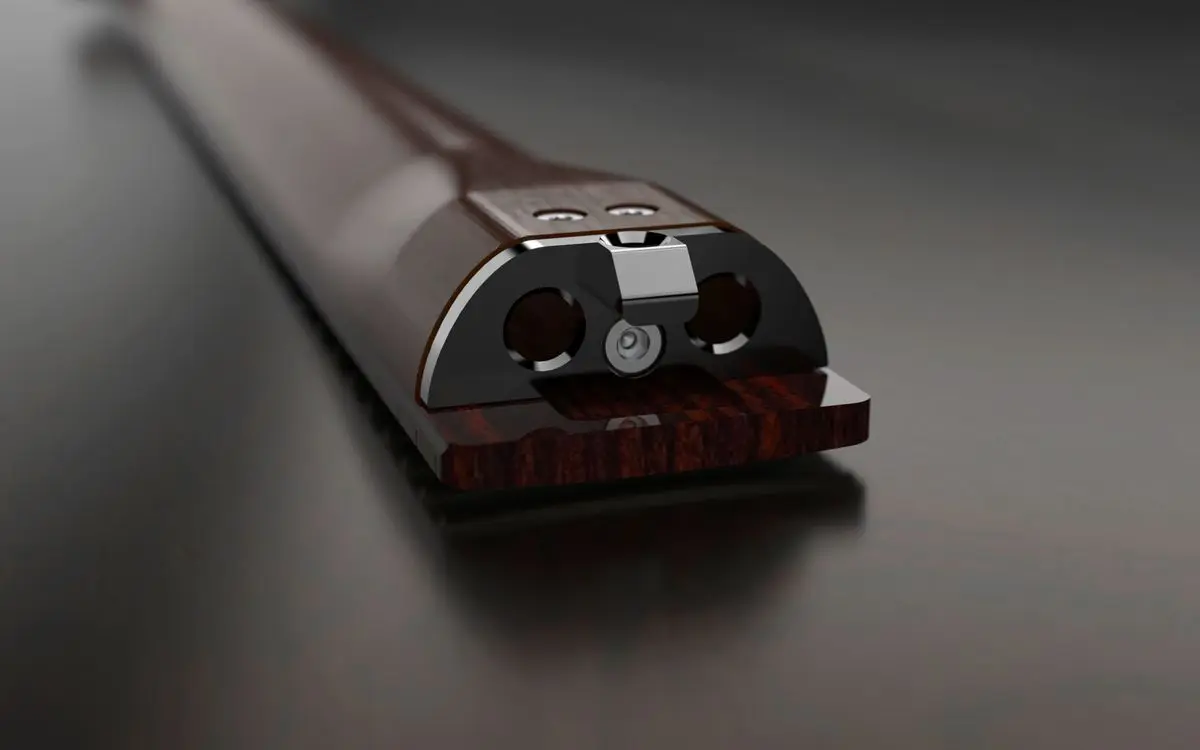
- The Titanium Neck Latch: A rectangular titanium release mechanism sits on the body just past the 22nd or 24th fret. We will push this latch to release the neck.
Step-by-Step Process
1. Prepare Your Workspace Place your Shark Guitar on a flat, soft surface. Position something soft behind where the neck will rest when released - a folded towel or cloth works well.
2. Remove the Neck Pickup Module (Optional) This step gives you cleaner access to the neck release latch but is not mandatory. Press the red button on the back of the guitar and the neck pickup module will pop out. Set it aside safely.
3. Engage Maintenance Mode Activate maintenance mode on the Shark Tremolo. This removes string tension and allows the nut's string carrier to be removed easily. Detailed instructions for engaging maintenance mode can be found in the "How to Use Maintenance Mode" article. After engaging maintenance mode, the strings should feel loose.
4. Remove the String Carrier Go to the nut at the headstock end of the guitar. Hold the upper string carrier piece with one hand. With your other hand's thumb, push the spring-loaded slide latch toward the headstock. The string carrier will pop free. Gently lift the string carrier out. All six strings remain attached to it. Place the carrier assembly in a safe spot near your workspace where the strings won't bend or kink.
5. Release the Neck With the strings now detached, the neck is free to be removed. Locate the rectangular titanium latch on the guitar body, positioned just past where the frets end. Place both thumbs on this latch. Apply firm but gentle pressure with both thumbs, pushing the latch toward the headstock. The neck will release from its socket with an audible click. Lift the neck away from the body and set it aside in a safe location.
6. Install the Replacement Neck Take your replacement neck. On the guitar body, you'll see two large titanium prongs (the T-Form Spine connection points). Align these prongs with the corresponding socket in the neck. Insert the neck, pressing firmly until you hear a metallic click and feel the release latch reset into its locked position.
7. Reinstall the String Carrier Pick up the string carrier assembly with all six strings still attached. Position the carrier over the nut base where it mounts. With both thumbs, push down firmly. The slide latch will move toward the headstock, then snap back toward the fretboard with a satisfying click. Verify the latch is fully engaged by checking that there's no gap between the string carrier and the nut base. If you see a small gap, push the latch with your thumb until the carrier lock is completely inserted.
8. Position the Strings Check that all strings are properly seated:
-
At the nut: strings should rest in their individual saddle slots
-
At the bridge: strings should sit on their corresponding micro-roller saddles If any string has slipped out during the process, guide it back into position.
9. Exit Maintenance Mode Return the tremolo to either tremolo mode or fixed bridge mode, depending on your preference. This restores tension to the strings and brings them back to pitch.
10. Tune and Play If the replacement neck has the same scale length as the initial one, you'll likely only need minor tuning adjustments. The system is designed to maintain setup integrity through the swap. Make a quick tuning pass to ensure all strings are at proper pitch.
You're done. The neck change is complete.
Important Compatibility Notes
Shark Guitar bodies are manufactured in two configurations:
-
22-fret compatible bodies
-
24-fret compatible bodies
Always match fret count: Install 22-fret necks only on 22-fret bodies, and 24-fret necks only on 24-fret bodies. Mismatched configurations will cause setup and playability issues.
Scale length considerations: If both necks share the same scale length and fret count, you can typically play immediately after a quick tuning check. If you're switching between different scale lengths (such as from a 24.75" Gibson-style to a 25.5" Fender-style), you may need to change string sets to accommodate the different string length requirements.
Why This Matters
Traditional guitars require specialized knowledge, multiple tools, soldering equipment, and significant time to achieve what Shark accomplishes in 30 seconds. The Ocean Environment's integrated design, where the T-Form Titanium Spine, removable nut system, and tremolo maintenance mode work as one unified system, eliminates every friction point in the neck change process.
A guitarist can carry multiple necks with different profiles, scale lengths, or fretboard configurations, swap between them in seconds, and maintain precise setup and intonation throughout. This changes what's possible during recording sessions, live performances, or when traveling with gear.
The system proves that modularity and precision aren't opposing forces. They can work together.
For more detailed information on related topics, see the companion articles on the Shark Nut Design, the T-Form Titanium Spine, and How to Use Tremolo Maintenance Mode.
Date Edited: 13-01-2026
Date Created: 17-12-2025
TAGSHow-To, Necks